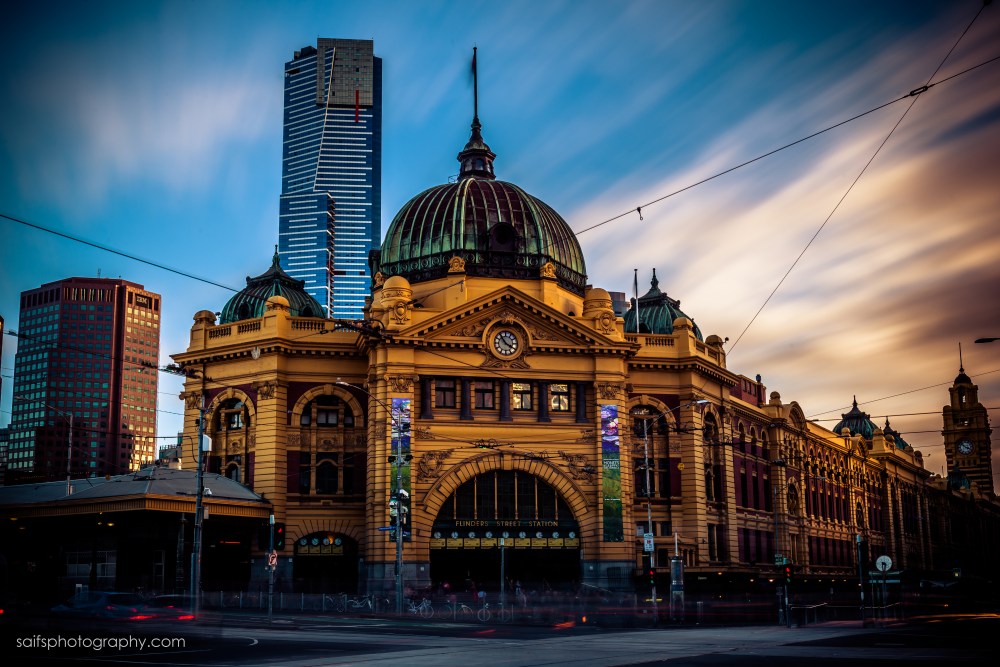
Flinders Street Station – one of the most photographed Melbourne icon, this building sits majestically on one of the busiest street corners in Melbourne.
I will describe the process of how I took the picture, so that you can also replicate the shot!
What you need to bring to the shoot
The following are ESSENTIAL when doing a long exposure photography shoot:
Step 1: Setup the camera and tripod
Find your subject and setup your tripod and camera.
Step 2: Set the focus
Switch to Autofocus and focus on a point in the shot where you want the focus to be sharp. Once you’ve done this, switch the focusing to Manual focus. If your lens has a focusing distance meter, take note of this value.
Step 3: Put on the Neutral Density (ND) filter
The reason why this step is after you focus is because the ND filter will darken your sensor, removing the ability for your camera to autofocus. When you’re putting on the ND filter, sometimes it shifts your focus – so, if you’ve taken note on the focusing distance, adjust your camera to the same focusing distance.
The ND filter I use is a Light Craft Workshop ND500 Neutral Density filter (for a 77mm thread). These are fantastic filters as they have a thin thread so the distance between the filter to your front element is smaller than most Cokin filters (which have a threaded housing for a ND fileter glass). I got mine from a store in Frankston called Peninsula Camera (click here for the link to the product from Peninsula Camera store)
Step 4: Setup the camera ISO, aperture and shutter speed
The ISO should be at its lowest (Most Canon’s this is ISO 200 and newer Nikons are the same at ISO 200) and the aperture should be narrow at f16. The shutter speed really depends on the day, but I suggest putting it into “bulb” mode. Most DSLR has an option where the shutter remains open until instructed otherwise by the user. Example: in bulb mode, the shutter opens when I press the shutter release button, and then it shuts when I press the shutter release button again. This gives me the ability to control the amount of light into the shot.
Step 5: Take the shot! 😀
Now, here is where the remote trigger is useful. With long exposures, you want to minimise your contact with the camera – so either get a cable release or a remote trigger to control your shutter release. It is best to also time your shots: try out different time lengths (e.g. 30 seconds, 1 minutes, 1.5 minutes, 2 minutes, etc) to see what effect you get.
So there you have it! Here are the details of this shot:
Camera: NIkon D600
Lens: Nikkor AF-S 24-70mm f2.8
ISO: 100
f stop: 16
Shutter speed: 58 seconds
Aperture: 16
Enjoy!
Saifs
